Wednesday, April 27, 2011

First ride, and leaky upside-down fork seals.


Got out for a real ride yesterday, even if it was just an "all-asphalt" ride.  Dave still has his DRZ400E for dirt riding, but he recently picked up a mint-condition 2007 Kawasaki Versys for when he doesn't want to get muddy. He invited me to join him, along with a couple of his street buddies for a ~200 Km ride that took us to Almonte, then over to Merrickville, and back home again. We stopped for lunch at a pub on the water in Almonte.


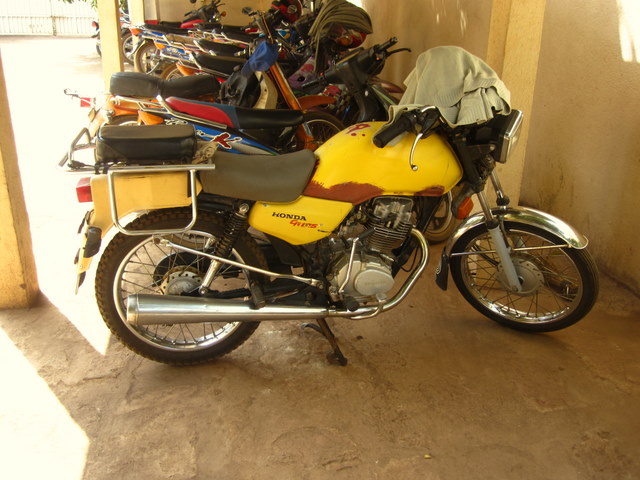
Anyway, it was the first real ride for me on my newly upgraded DR since it came out of winter storage a few days ago. The bike ran great and the new RMZ forks and the rebuilt and upgraded rear shock were awesome... except that I noticed both fork legs were leaking oil even before I arrived at Dave's house. Oh well, I went along for the ride anyway -- hoping that oil wouldn't find its way onto my front brake rotor.

When I got home I was curious and just had to take a better look. When I took the RMZ forks apart over the winter and put new seals in them, I had my doubts that I was installing the new seals properly. What? Was I installing the seals upside-down in my new upside-down forks? 

The aftermarket All-Balls seals looked almost the same from both sides, so it was hard to determine which side was up.  And, as it happened, when I ordered the All-Balls seals from my local dealer over the phone, I mistakenly ordered both the aftermarket and OEM seals at the same time. I inquired about returning one set and they told me about their silly re-stocking charge policy so I decided to keep them.  Anyway, once home from my ride yesterday, I pulled them apart and installed the new OEM seals (far more obvious which way goes up).  Went for a good ride when I finished at bed time, and so far, no leaks.


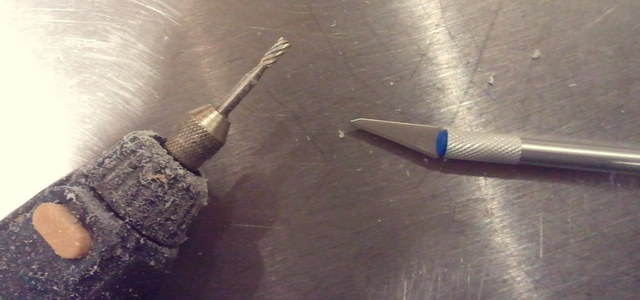
The All-Balls seals. Which way is up? I dunno.
Throw those away and stick with OEM seals.

Saturday, April 23, 2011

Back home, just in time for riding season

Got home from my month-long business trip around the world. Whew.  Was a great trip, but I sure worked many long days.  I even had a bit of free time in Auckland, New Zealand and decided to rent a bike.

The rental was from this place:  http://www.motorcycle-hire.co.nz/.  Aiden was great to deal with and he set me up with a nice Suzuki DL650 V-Strom. I rode about 400 Kms from Auckland down around the Coromandel Penisula. Spectacular vistas, stunning scenery, and terrificly twisty tarmac.


Somewhere along the Coromandel Forest Park


View of the Auckland city scape from the bridge, 
shot from the back seat of a taxi after returning the rental bike.
The sunset was great - a perfect end to a perfect day.


Saturday, March 19, 2011

Winter upgrades almost done

The RMZ front end is now bolted on, as are the bar riser clamps, top clamp, handle bars and hand guards from Highway Dirt Bikes, and the Vapor computer is bolted into the HDB billet Vapor protector dash, Corbin seat, DRZ tail light (and a yellow rear fender I found on ADV Rider). My new Alps Mountaineering Neptune 2 tent arrived today. Just waiting for my Pat Walsh luggage rack to arrive. Then I just need to figure out how I will mount my Pelican 1430 top-loading cases for use as panniers. Looking forward to some dirt bike camping this summer.


Good news, bad news...

Good news: the snow is melting fast and riding season is about to start (it was nice enough that I'd have ridden to work today if the bike was ready). Bad news: tomorrow I leave on another trip for work. This time I'll be gone for just over a month, so it seems I will miss the first few weeks of riding season. That's a hard  pill to swallow after not being able to ride for 3 months now because of winter. I'm dying to ride, the weather is finally cooperating, but I'll be away for a month. On the other hand, I am looking forward to this trip. It's a true round-the-world trip: Ottawa > London > Mumbai > Singapore > Bandar Seri Begawan >  Perth > Melbourne > Auckland > Vancouver > Ottawa. Unfortunately, it's not a tourist trip... it will mostly be long work days, with very little time for seeing the sights.


Saturday, March 12, 2011

2 weeks in Africa

Went to Africa for work recently. One week in Bamako, Mali, followed by another week in Ouagadougou, Burkina Faso. Both are former French colonies, and located in the North Western part of the continent. Hot and dry climate. Had a great time, even if I did spend long hours at work every day.

Took photos of some of the motorcycles I saw. Interesting to see all the different bikes people ride in other parts of the world.

Hotel in Bamako

Bananas just outside my hotel room.

Typical Bamako side-street

Typical woman on the main drag in Bamako, selling carrots.

Beer time.

Soccer is very popular

Yamaha DT175


Honda CG125


Yamaha 100cc 2-stroke (these are very common)


Baotian - never heard of these things.

Not the same KTM as most westerners would think.


Check out the KTM !

View from my hotel room in Ouagadougou, Burkina Faso


 Some type of air-cooled Honda v-twin in Ouagadougou --
the largest dispacement bike I saw.


 Honda TransAlp -- in Frankfurt 
(where I spent a night on my return trip)

Tuesday, March 8, 2011

Rear shock upgrade - completed

A few weeks ago, I wrote a post about my plan to have Cogent Dynamics rebuild and upgrade the rear shock. Well, I just got back from a 2-week long business trip and the newly upgraded shock was waiting for me when I got home.


The "before" photo: the OEM shock with a 7.5 Kg/mm spring from ProCycle


The "after" photo: the same OEM shock with the full Cogent treatment.

So the shock was rebuilt and upgraded by Cogent Dynamics in North Carolina. Here's a rundown of the work they did:

  • new longer and thicker shaft (Yikes! Sounds like a penis enlargment scam!)
  • new lower mounting clevis
  • added a compression adjustment clicker knob, the red thingy (previously, there was compression damping adjustment)
  • new 8.1 Kg/mm Eibach spring
  • anodized the shock body exterior
  • ceramic-coated the body interior for better heat dissipation
  • new seal head assembly with with bushing seals and O-rings
  • new piston with a custom-made shim stack for me (a 200 lb. rider)
  • new needle and needle jet
  • new spring clip

By the time it was done, and round-trip shipping paid from Canada to North Carolina, the whole thing worked out to $601 on my Visa card. A lot of money, yes, but others who have done it all agree it's worth every penny. They were also kind enough to return the aftermarket spring I had installed last summer (a 7.5 Kg/mm spring from ProCycle). I've already sold the ProCycle spring for $100.  The original spring from the factory was a soft and squishy 6.5 Kg/mm. Can't wait to install this thing and go for a ride. Just gotta wait for the snow to melt.

Also waiting for me was a spare front wheel I bought on eBay. With the new RMZ front end, I have a wheel already but I found a deal on a front RMZ wheel in very good condition. So, now I have 2 full sets of wheels. I intend to have a set of knobbies mounted on one set, and a pair of more street worthy rubber mounted on the other set.

'07 RMZ250 front wheel found on eBay for $100.
Very nice condition, will make a nice spare.

Saturday, February 19, 2011

Headlight brackets for 50mm fork tubes

Since the RMZ250 does not have a headlight, it meant that I would need to figure out some way to mount a headlight once the RMZ forks are on the bike. Fortunately, the DRZ400SM (only the SM model, not the 400E or the 400S) has the same size fork tubes (50mm) as the RMZ, and since the DRZ400SM is a street bike, it has a headlight. I've been keeping my eye on eBay, watching for headlight brackets. New ones from the dealer cost ~ $140 by the time you get the 4 rubber inserts (upper and lower for each side) plus all the taxes. I found a seller on eBay who was stipping down a brand new DRZ400SM for a conversion to a track bike, and he was selling the headlight brackets for $29, plus $10 shipping. Score!

Now I can mount my original DR headlight plus the headlight cowl. However, I plan to ditch the actual headlight glass assembly and just use the mounts with the cowl, and make my own bracket to bolt a VisionX Solstice 10-Watt LED as the low beam, and a 24-Watt LED from ADVMonster for the high beam. Hopefully, I can design some type of lexan protector shield to place in front of them and make it all look good and work properly.

The DR650 headlight glass
Right:  DRZ400SM headlight brackets (fit 50mm forks)
Left: DR650 headlight brackets (fit 43mm forks)


Wednesday, February 16, 2011

Keyed iginition switch, Raptor fuel petcock, Pelican Panniers

One item to be sorted with the RMZ fork swap is: what to do with the DR650 ignition switch?  Well, the key mechanism has never worked well on my DR. Ever since I got the bike, I have often fought with the key. It goes into the key hole easily, but getting it to turn is another story. You've gotta jiggle it the right way, work it back and forth, piece of shit. 

The previous owner of the bike gave me one worn out OEM key, and one brand new OEM key. I immediately had duplicates made of the new key, but I think the lock itself was already worn out. In any event, I'm tired of screwing around with a key that requires so much persuation to work, so I decided I would ditch the key entirely. Besides, the steering lock isn't going to work with the new RMZ top triple clamp. So a push-button on/off switch will do the trick.  Just needed to figure out the wiring. A little sniffing around on ADVRider and ThumperTalk taught me that the guts of the keyed iginition contains a 100 Ohm 1/4 watt resistor.  Let's get to work:


The OEM keyed iginition switch - stupid key never worked properly anyway.

Snip.... I need that green connector.

My local electronics supply store doesn't sell individual resistors,
so I had to shell out 99 cents for this 10-pack of 100 Ohm resistors.

The orange with yellow tracer wire

soldered in place

* brown and grey go together
* black with white tracer, and orange with yellow tracer go together
(with the resistor soldered in there, under the long piece of black heat-shrink)
* the on/off ignition switch will be installed between the red and orange


Next up: the IMS gas tank is great in that it expands the fuel capacity from the stock 13 Litres to about 20 Litres. However, IMS supplies a really, cheap, crappy fuel valve that will eventually fail. This valve has the same build quality of something you'd expect to buy from the dollar store.  Every time you turn the valve to ON, OFF, or RESERVE, it feels like the damn thing is going to break. Rather than wait for that inevitability, I decided to be proactive and do what many others have done: replace it with the much sturdier petcock from the Yamaha Raptor. Except for a 5-minute hack job required to enlarge the hole slightly, it's pretty much a direct bolt-on swap. The Raptor valve is about $25, available from any Yamaha dealer. Part #5LP245000100

Left: OEM Yamaha Raptor petcock
Right: junk petcock supplied with IMS gas tank

use Dremel and hobbyist scalpel knife to carefully
enlarge the hole on the IMS tank

Here the hole has been enlarged slightly to allow the Raptor fuel valve to fit

Raptor petcock installed, as well as a one-way venting valve
for the gas cap (eliminates the need for a long, floppy vent hose on the gas cap)


Finally, a sneek peek of my next project: Pelican panniers. Somehow, I'm going to mount these onto the bike to be used as my indestructible and waterproof luggage system. These are the Pelican 1430 top-loading cases. They're not huge, just ~ 15-17 Litres in capacity. I'm not looking for huge, rather, I'm looking for tough and durable.... and dry.

Stay tuned to find out what craazy idea I dream up to mount these things.

Thursday, February 10, 2011

More farkles - HDB hand guards, Corbin seat, LED lighting, fuel petcock, and more

Highway Dirt Bikes top clamp, 2 1/8" bar clamps, hand guards, 
2 sets of plastics, 4 waterproof on/off switches, 
Vapor dash protector.  Expensive, but the most rugged
setup you will ever find. 


And a recent drive to Ogensburg to pick up a few other items:
a great bargain on a Corbin seat (like new condition, it was just
$200 including shipping), a 24-watt LED auxiliary light (this thing
is as bright as the sun, from ADVMonster.com), a Yamaha Raptor
 fuel petcock, a DRZ250 tail/brake light, an ultra-bright LED strobing 
auxiliary brake light from Strobes N' More (called the E3 Super LED),
Twin Air foam filter, OEM Suzuki air filter basket and mounting clip, and
finally, a gasket for the mid-pipe to muffler joint in the exhaust system.