Wednesday, June 25, 2014

Billet fuel filler & Acerbis cap

CJ Designs billet aluminum fuel filler neck with Acerbis cap. Very expensive, but very nicely crafted piece of metal. The OEM gas cap and filler neck are pure junk. No idea why KTM engineers don't come up with something better -- especially after 6 years of reproducing the same crap.

CJ Designs billet aluminum fuel filler neck with Acerbis cap. Very expensive by the time it was shipped to Germany, and converted from US dollars. But now I'm not worried about breaking the ignition key in the junky OEM gas cap.


Comes with 3 stainless steel bolts (3mm hex)

The OEM junk: locking cap, filler neck, O-ring, 3 torx bolts.

The OEM pieces removed.

The new piece ready to go in.  
*** NOTE: You need to re-use the OEM rubber O-ring. ***

Installed in about 6 minutes from start to finish.

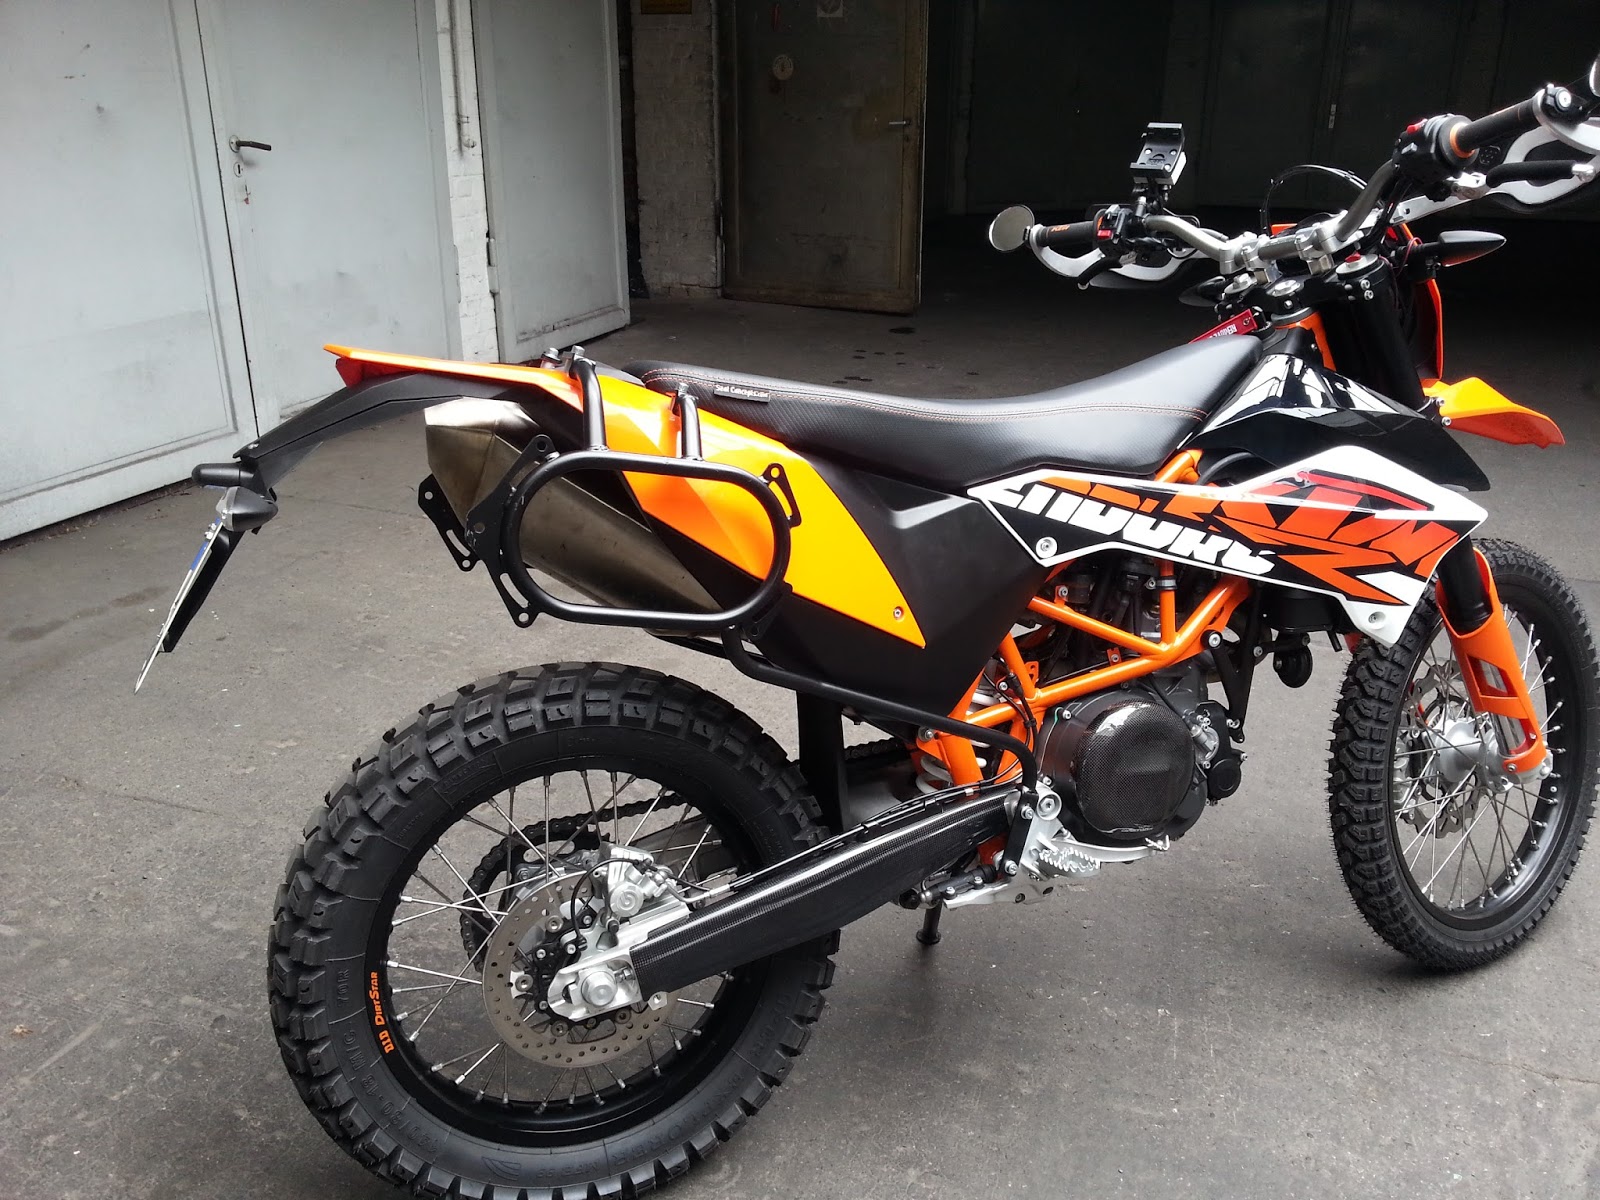
Wolfman side racks, Giant Loop Diablo tank bag


I managed to get my hands on one of the last sets of Wolfman side racks ever sold. I bought them from RockyMountainATV and had them shipped to a friend's place in Maine. A few weeks later, he was coming to visit me in Berlin and he brought them to me. Free delivery all the way to Germany! Awesome.

Took me a while to get around to installing them. Left side rack went on like butter. Perfect fit. The right side rack needed some mild persuasion but it wasn't bad at all.

Had to drill the rear fender. Fortunately, the location
for the mounting holes are already marked - makes it real easy.
5/8" was just a wee bit small.

These are the spacer/bushings for the mounts.

I ended up enlarging the holes a little more, to 18mm. Perfect.


This photo shows the Giant Loop Diablo tank bag. 
A larger version called the Fandango is available, but 
I like this size. Very nice quality. The bag unzips from 
the base very quickly so you can take it with you.


Do these racks make my butt look fat?


Rear shock preload adjustment

Jeezus Christ.... using the overpriced KTM spanner wrench (€26 at your friendly neighbourhood KTM shop) you still need to remove the fucking shock from the bike in order to crank the collar up or down the threaded body to increase or decrease the amount of preload on the spring. I was very tempted to use a hammer and a drift but the collar is made of Play Dough or some other similar soft material. I tried, in fact, and was shocked to see how easily the collar was being damaged. So, I shelled out my hard earned cash and bought the fucking wrench.

So, up on the stand, off came the seat, side plastics, voltage regulator, air box (on pre-2014 models the air box can stay when you need to raise the fuel tank on the upper pivot), rear fender, lower tank mount bolt, and the muffler. Then you can raise the entire rear sub-frame/fuel tank assembly, and remove the upper and lower shock bolts.

I cranked the collar and lock-ring about 1/2" in an effort to lower the seat height a little. After getting it all back together, I confirmed it was a success, but I wish I had gone for a full 1" of added preload. Screw it. I'm still way up on my tippy toes, but it's an improvement.

I did this job on the same day that I wrapped the wiring harness. I figured since I was going to be tearing into the electrical system, I might as well do the sock adjustment at the same time.


KTM factory GPS mount

I happened to be browsing at the KTM shop and saw a Power Parts GPS mount.

KTM part # 76012992044

It has a very nice factory, polished look. Since it mounts directly onto the handlebar clamps, it is less prone to vibrations than clamping the GPS further out on the handlebar. The real bonus is that there is a small hole on the side for installing a power plug. I purchased a powerlet/DIN power socket from a local electronics shop for about 5 bucks. Identical to this. I removed the spring-loaded hinged lid because the socket is completely sheltered from the elements, and also it was hard to get the plug into the socket. Now I can connect my trickle charger or whatever I like.


Here I have mounted my Garmin AMPS rugged powered clamp for the Montana onto the KTM kit's rubber dampened mounting plates.

I also wired up the audio plug from the Garmin AMPS mount, 
along with a digital volt meter. The male spade connectors will be 
connected to the female plugs of the available switched accessory 
circuit which is found behind the headlight. 

Here is the Powerlet/DIN socket and a plug. I connected the male spade connectors to the non-switched (always on) accessory circuit that is found behind the headlight. This way, I can keep the battery on a trickle charge.


The view of the speedometer/dashboard is not obstructed by the GPS.
You can also adjust the angle of the GPS very slightly.


The arrow shows the DIN power socket.


Tuesday, June 24, 2014

Wiring harness protection

KTM does a very shitty job at wiring up this bike. My old Super Duke had sketchy wiring, too. The main harness that runs along the trellis frame is wrapped very poorly using a very cheap quality fabric tape (think hockey stick tape). After a while, it rubs against stuff and you'll end up with weird electrical gremlins, or worse. Also, it's not very well protected from corrosion/moisture.

So, I decided I would wrap as much of it as I could using something of higher quality. I used 3M brand 130C linerless splicing tape. Top quality, stretchy, waterproof, self-sealing.

I also used a kid's art class paint brush to apply dielectric grease to most of the electrical plugs/connectors.

It was tedious and frustrating at times, but I think it's an improvement.


Air box removed, this is what the harness looks like.

Diving into the fuse panel, ECU and battery removed

I wrapped the two leads going to the positive terminal 
on the battery using red electrical tape.

The relays and fuse block, main harness partly done.

the terminal where my thumb is was quite loose. 
Holy fuck! This is a brand new bike.

And for no special reason, a photo of the OEM battery.

Finally, I protected the fuel hose with some split wire loom 
tubing as it is known to rub against the frame over time.


Sunday, June 8, 2014

Makeover


A makeover, a facelift. Call it what you want. I wasn't particularly crazy about the white plastics on the 2014 model, so I ordered a bunch of orange body work, and some carbon fibre bling. Also, a SeatConcepts foam and vinyl cover.


Carbon fibre ignition case guard

Carbon fibre clutch case guard

Orange fork guards


This is the 2008 fender which I found used but in
 excellent condition. I like the angular lines and shape
 of it compared to the newer style.


With the new tire

I also removed the rear shock in order to properly turn the 
collar for the spring. I wanted to get my feet a little closer 
to the ground, so I added about 1/2" of preload on the spring. 


Shock removed.

SeatConcepts foam and vinyl cover installed.


All done. Let's ride.

No, wait ... let's stop for a photo shoot first, then ride.


Wednesday, June 4, 2014

New rubbah

I removed the stock Pirelli MT-21 tires with just 250 Kms on them.
I don't want to wear them down just farting around the city. 
They are a very good 60/40 dual sport tire, and I'd like 
to save them for a long weekend dirt ride to Poland.

The new Mefo Explorer on the rear. Meaty, but less aggressive than the Pirellis.
These should do well around the city, and some occasional dirt roads.


New Mefo Explorer on the front.
Only €180 for the pair at my local KTM dealer in Berlin.